


The beauty of HC B&W images.
Colour and 'normal' black and white photography is fun. In fact I grew up at a time when b&w was the predominent format and I processed many images in the darkroom of my employer.
Of course with the Instamatic Photography, colour became dominent, even that at those time a single print could cost as much as 1.30 Deutschmark. This would equate to about DM 10.00 per print, based on purchasinge power.
So in Australia, that would be about 10 Dollars, depending on the exchange rate applied.
Not a cheap hobby, then.
However over the next 5 years the price of prints reduced to as little as 0.3 DMK and even less further on.
B&W became the choice only for serious amateurs and professionals, often acrchitectual photographers. In the mean time millions of colour images are uploaded to social media every day. So a B&W image and even a HC B&W image can have a real attention grabbing effect and appeal.
Nowadays most digital cameras have a b&w setting and some even feature High Contrast B&W.
HC B&W images always have deep shadows with little or no details. Set against the white lines, these images really 'jump' out. If you have an imaging editing software, you can also try to convert colour images. These work best, if they have already a higher contrast, so shot at midday or night. While images with lower contrast or shot during rainy and overcast days may not 'feel' right once converted.
In any case it is a great exercise to try it out.
In some softwares you have a 'filter' setting, like high contrast red. This is similar than shooting with a dark red filter on your camera. Blue sky gets almost black, as does green. You get a very high contrast.
Of course you can also by a red filter for your camera. But do not e surprised if you image in saved in RAW or DNG, still comes in full colour. If you want to save the filter effect you need to set the camera to save in JPG.
Here are some examples of HC B&W. All images are copyright Norbert Schmiedeberg/ ncas_48Photography.


Sydney CBD


From the plate camera to Lumix S1R
This is not really a write up about the evolution of photography, more about my personal experience and how I want to bring this into our new business venture ‘NCAS_48’, which is to complement our AV business ITI-Image Group. Afterall audio visual and photography belong together.
After my dream becoming a pilot, due to me wearing glasses, was shattered, I started out in a career in photography. Accurately more correctly in dealing with photography, but my education and training brought me face to face with darkroom photographic work. From weddings (not so successful) to medical (not so much fun in running flashlight cables through blood puddles on the floor) to industrial (lots of fun). Of course the photography I really love is travel and, what is nowadays called street photography.
In selling cameras, projectors and darkroom equipment I learned a lot about the equipment of the day and the customers. Since I worked in a small camera store on Hamburg-Harburg, I became involved in virtually all aspects of the business, except bookkeeping. An activity, I still don’t enjoy today.
Being young almost everything was exiting and fun. At least most of the time. In our company we have had a lot of apprentices, whereby apprenticeship in Germany is something very different to what is is here in Australia and it covers much wider fields, including retail management, etc..
One day a week I would travel to the other side of Hamburg to attend the professional school. We learned everything from the mechanics of cameras, to optics and darkroom technics. One of our teachers was a chemist from TETENAL, a company which manufactures photographic chemicals in Hamburg. Our teacher, Dr. Mutter, was not a typical teacher, but a scientist. He had possibly more in-depth knowledge about the photographic processes than any other teacher in the country. He also loved chess and taught us. So half of our lessons, was playing chess. I don’t know where from, but there were at least 10-15 chess boards in the class. Often these classes were the last one on a Friday and subsequently went over time, until the school caretaker throw us out.
Great times.
Over the years I got to work with and own many cameras. My first camera was a roll-film, 6x9cm camera, a very common format thouse times. 6x9cm would give us 8 pictures per roll, if I remember right. A far cry from the 36 pictures you would have gotten on to a normal KB roll (Kleinbild or 24x36mm film). Everything was manual of course and in Black and white.

I still have some of these pictures in my school work books and the quality of these comparatively basic cameras was incredible. Of cause many were made by famous brands like Voigtlaender, Zeiss Ikon, Agfa and Rollei.
But 35mm film became the dominent format and I still remember when the factory rep brought in one of the early Topcon 35mm automatic cameras. The Japanese manufacturer were leading in these developments at those times. Of course brands like Leica, Rollei, Zeiss were the jewels of the industry, together with the spy camera Minox, but these were expensive, much to much for our modest apprentice salaries. Even after I finished my formal education in 1967, I only earned about 700 Deutschmark a month, which is possibly as much as the jobseeker (unemployment) allowance is in Australia nowadays.
So one of my first system cameras I owned was a Pentax from East Germany with a famous Jena lens. I also often used an Exacta, as well from East Germany. My boss was very generous and allowed us free loan of any second hand camera the shop had and sometimes even new stock over the weekend.

In fact Claus Schroeder, was most generous. He gave us, though mostly I used it, access to the darkroom after hours. Working on the places, where the girls, interestingly it were almost always women who worked in our darkroom and enlarged and processed clients pictures, I developed my own pictures. He only charged us the cost of the paper.
In those years simpler camera technology emerged. The Kodak Instamatic and the Agfa Rapid. Both designed to bring photography to the masses. Cheap, easy to handle and reliable cameras. Film sales boomed and the darkroom created great income, if you consider that the standard 6x9 cm print cost between 1.20 and 1.50 DM or about USD 1.00. Of course in the 70’s and beyond, with automated processing and the appearance of discounters, like ‘Tausend Toepfe’ (Thousand Pots), the price dropped to 30 pfennig a print. This also made many of the darkroom girls redundant. But that was after I left the store and moved on.

Over the years I used many a camera. But one brand always remained my favourite one and that is Leica. In fact there was once a risk that this brand would go under, but in the 90’s it was rescued and has become not only the leading luxury camera brand but a driving force in the lenses for cinema production and many other fields.

I used many of their models. From taking a M2 to South America to a Leicaflex SL, which was exchanged to a Leicaflex SL2, which I still own, to an M6, R3, R4s, Leica T and TL2. The latter was exchanged last year for a CL.
But for me it is not so much the camera technology. Even that I would love to buy a SL2 or SL2s. For now a Lumix S1R has to do for financial reasons, it is the Leica lens technology.
From all the lenses I ever used, I feel that the Leica lens have the nicest rendering, the best, warm colours and an inrcedible sharpness.
But they also have a great mechanical feel. The M-series as well as the R-series. Of course lens technology has evolved, but I am using now my R- and M-lenses on the Lumix camera, which features the Leica L-mount, adapted by Panasonic and Sigma.
These older lenses have a different appearance to the new T-type from Leica. They are not as clinically clean, as many lenses are, which have been calculated for the digital world. But they look great and being forced to be just manual (no autofocus here), they force me to look even closer at the objects and image composition.
NCAS_48, will get involved in consumer photography again, while my main company ITI-Image Group, will keep focussing on Audio Visual and particular projection. I love the interaction with amateur photographers. Like to see their results.
In the next write-ups, I will talk about my experience of using a low cost Chinese Lens for L-Mount,
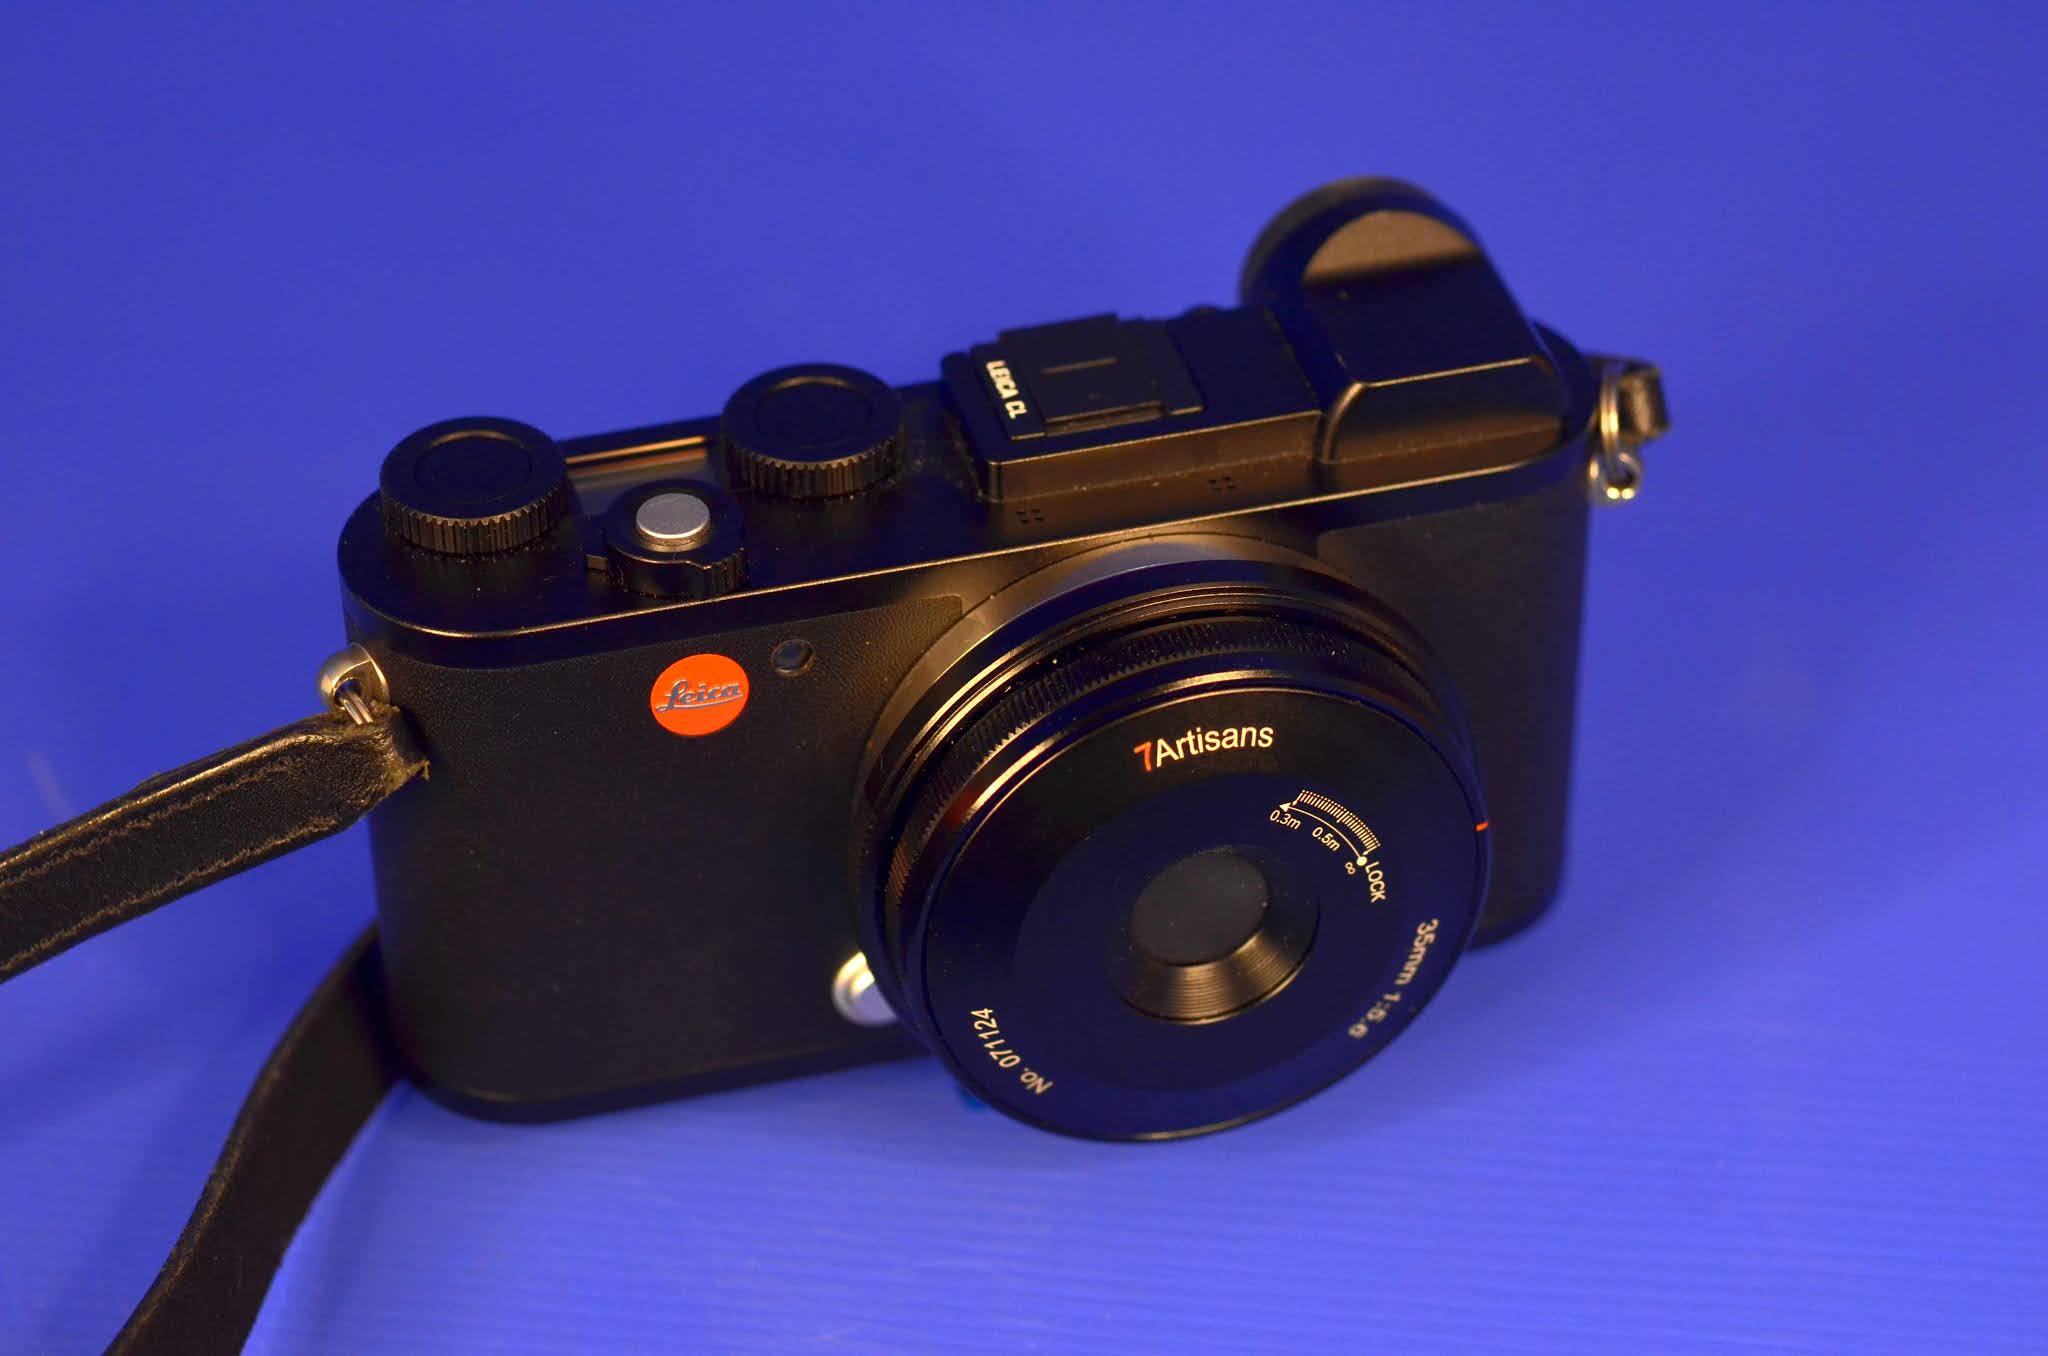
the search for reasonably priced R> Nikon> M> adapter to the L-Mount , working with a glass plate camera and other subjects as they come along.
Drop me a line if you like to join any discussion or like my opinion on anything photography. ncas_48@yahoo.com

Projection surfaces seem to be a mute subject to talk about. A simple, ideally ironed, bed-cloth would suffice as a projection surface, right? If I can project onto any wall, floor, ceiling, regardless of design, material or colour, why do I need a dedicated projection surface, right?
Well, lets create an analagy.
You can mount 4 wheels to a board and roll down a hill. If you attach the wheels on to an axel and mount the axle moveable you can even steer. But you would certainly not get into city traffic with the contraption or win a car race.
Projection surfaces are similar. With a bedcloth I can get a rudimentary result. But it is not optimal and will neither reflect the capabilities of your projector or the quality of your content.
Projection surfaces are made of different materials, colours, consistencies and come even in opaque or transparent, white or dark and everything in between, so that you can have an all-rounder, which works everywhere, but maybe not optimal, of you can have surfaces (screen-materials), which give you the best performance.
In the following series we will review different materials for rental and staging, corporate, home, retail, exhibition, special effect use. We will try to keep it simple and not add to many diagrams. Yes, we may show you how the colour performance may be and why that matters, how the viewing angle is and why that can be critical and how the material performs on not so ideal environments.
Some of the first distinctions we will have to make is the difference between foldable and roll down material. PVC based and fabric or fibreglass. Acrylic foil or sheet and projection paint.
Finally we will talk about cleaning and service.
This is a comprehensive program. Not to tax you to much and take up of your valuable time, we will break this down into small junks. It is like eating. Consuming smaller quantities keep you healthy and slim.
So I hope you will stay with us and get to know your projection surface and be able to create a better screening experience.

The challenge to create cost effective and impactful digital displays and audio visuals.
Budgets, apart from really prestigious projects, are always tight and every cent spend on a retail, museums, gallery and visitor centre installation must be well considered.
What are the key elements in creating a cost effective 'show' for your viewers?
A good story:
Look for the story, not the product”. Everything has a story to tell. Regardless if we sell toothpaste or a designer dress, a new electronic gadget or a big truck. There is a story behind it.
If you are a museum, national park, visitor centre, you have already a good story. The trick is to tell it well.
Make it engaging? Make it fit the mindset of your audience, not the mindset of the curator, designer, administrator or sales person.
Ofthen less is more and simple can have more impact.
This applies to everything, the audio, visual and technology side.
Viewer engagement.
Engage your viewers. Make them part of the story. This does not neccessarily require wizz-bang interactivity and augmented reality. Sure these aspects can help, but they can be costly and not always be reliable, in particular if you don't have dedicated staff.
Find the element in your story, which will people want to linger and see and listen. A cute animal picture, a baby, a ......, often does more then complex technology.
Make it big:
Most people in this world are visually oriented, even blind people refer to ’seeing things’.
So the visual impact is most important. Use big screens or multi-screens (no this does not cost the world). Surround people with images. Immerse them. Complicated? No it is not.
Interaction.
Get your audience to interact with your story by touching the emotional element.
Technology.
This comes last.
The range of technology is wide ranging and so is the price. But the most costly technology is wasted if the story is not told well.
On the other hand, effective use of projection foil and mirrors, projection on to objects, panel displays, mirror walls, suspended acrylic screens, all this can help to tell your story with a minium of expense.
LCD, Projection, LED?
Sales people will tell you that a 40K+ LED wall has more impact, then a 10K three projector show on a wide screen.
Rubbish. There are applications where a LED wall will shine and have the desired impact. On the other hand 3 x $500 LCD monitors and a controller can equally engage your audience.
If you have the space, put projection into a darkened room. Why do we still go to cinemas? Because we like these spaces, which allow us to immersive into the story on the screen. Cost a fortune? Does not have to. A blacked our space can be created as a room within a room at minimal cost. Or you have the space, just utilize it wrongly.
Whatever, create the impact and tell your story well. Then every dollar you have invested will pay back multiple times.
Want to talk? Just contact us at itiav.info@iti-imagegroup.com.au and we ring you back.
 |
| LED display at Kowa Private Show, Japan |
 |
| Immersive Projection - Image provided by Mediatec |
Projection vs LED
Many sellers will make you believe that this is not a discussion worth having. LED is all what there is and everything else is old and old fashioned.
Right? Wrong!
Of course, there are clear, undisputed applications which require LED technology. High ambient light displays for example. Retail, foyers, theme parks, advertising. No argument.
Personally, have been so impressed with some LED displays, such as the one hanging in the Domestic Gate area at Qantas terminal Sydney, that our company will also jump onto the band wagon.
But not at the exclusion of all other technologies.
In fact, both projection and LCD have undeniable benefits in both, method of deployment and cost. Yes, cost. While LED is coming down in price, the cost of a 110” display is still way above an equivalent projection display and that at only 1.2-pixel pitch.
I believe that there is justification for both and we have to remove the label ‘more modern’ since for the viewer it is not here or there which technology is being used. Only image quality and legibility should count. Do count.
So, lets look at this objectively:
Let’s compare: Projection, LCD, LED Direct View, LED panel type:
|
|
Projection |
LCD |
LED Direct View |
LED Panels |
|
Flexibility |
Highly flexible, since projection sizes can be freely changed. The only limit is the projection screen. |
Smaller LCD screens up to 50” are highly flexible, light weight and easy to transport. |
Even housed in a fixed frame, these screens are not flexible, due the large dimensions and weight. |
Since they come in smaller panels, these screens can be set-up more flexible but they take time to set-up and have limited deployment. |
|
Set-up speed |
Very high. A 220” display can be set-up within 30-45 min. |
Very fast set-up. Just plug in and go. However, getting a very large screen to location may require more time. |
Conceptionally fast set-up. However, the weight of the display may make is much slower to move to location and to get it ready. |
Slow, since a frame needs to be built and the panels are installed one-by one. Modern screens have less cabling, but the physical set-up is still slow. |
|
Portability |
Very high, even screen to 330” and larger. Projector weight increases for units of 10K and more light output, but the portability is still very good. |
Up to 50” size, easy to transport. |
Difficult, since a 110” screen may weigh 134kg and a 220” screen 500+ kg. |
Portability is easy, since the screen breaks down into smaller components. |
|
Image brightness |
The image brightness can be very high, but is affected by ambient light. Performs best in controlled light conditions. |
A normal screen has about 300-400 nits brightness, which works well in indoor conditions. 700 and higher nits displays are suitable for window display without direct sunlight shining on to them. |
Image brightness can be very high. In fact, it can be too glary if deployed incorrectly. Brightness 100-500 nits for indoor units. But it is understood that humans may find LED to appear brighter due to the spectral range. Outdoor units have a higher brightness range. |
Image brightness is very high. Therefore, LED is generally found in outdoor advertising and information displays. LED panel displays are also great for large screen applications, which have high ambient light elements, such as conventions and product launches/ exhibitions. |
|
Image quality |
The image quality is very high, since several projectors can be combined. 4K and even 8K projector resolutions are available. A projected image is generally perceived of better quality due to the way the light is slightly diffused by the screen material. |
Generally, very high. |
At 1,2 or 1.9 pixel pitch the image quality is lower, compared to projection and LCD. This could be of concern for long viewing times and can cause eye fatigue. |
Considering the usual viewing distances, the image quality appears very high to the viewer. However, the correct pixel pitch much be selected for the particular application. |
|
Image control |
The image control is very high, both in respect to colour, brightness, black level as well as physical image control in respect to warping and image correction. This is achieved through projector control, external controller and screen selection. |
Limited to the build-in controls. However external controllers can expand the adjustment range. |
Generally, very high. Limited to the build-in controls. However external controllers can expand the adjustment range. |
Most screens are driven by external controllers. The image control is only limited by the technical capabilities of the respective panel. |
|
Legibility |
Can be very high, even at long distances. |
Can be very high at correct viewing distances. |
Depends on pixel pitch. A pitch, such as 1.2 or lower will provide better legibility. A to wide pitch will make viewing more tiering, since missing information must be computed by the viewers brain. |
If correctly deployed the legibility can be very good. This depends on pixel pitch, content and viewing distance. A tightly spaced spreadsheet may be harder to read, then a large are image. |
|
Colour |
Colour control is extremely good and can be influenced by the projector, display technology, controllers and screen. |
If correctly set-up, the colour quality will be very good. |
The overall colour quality can be very good. Some viewer may find the colours to glary or over saturated. |
The overall colour quality can be very good. Some viewer may find the colours to glary or over saturated. |
|
|
Colour perception is influenced by many factors, so it is difficult to generalize. |
Colour perception is influenced by many factors, so it is difficult to generalize. |
Colour perception is influenced by many factors, so it is difficult to generalize. |
Colour perception is influenced by many factors, so it is difficult to generalize. |
|
Cost |
On a per sqm basis the cost is low. |
LCD can be very cheap and be the lowest for smaller screen sizes up to 50-60” and normal brightness. |
High |
High |
|
Security |
Risk of theft is low, through projectors need to be secured if unattended. Installation risks are low due to the limited weight of the components. |
Theft risk is higher for smaller screens, though the low value may not make it interesting. Larger screens have a greater install risk, due to the higher weight. |
Low theft risk due to the weight, but installation risk can be high and positioning security is important. |
If packed-up the screens have a higher theft risk. Once installed, this diminishes substantially. However, the high product weigh, adds substantial installation risk. |
|
Power consumption |
Relatively low. Low heat generation also reduces overall power requirements on A/C etc. |
Generally low. |
The power consumption varies, depending on deployment, image brightness and pixel pitch. There is also a higher ambient heat generation which may require additional air conditioning. |
The power consumption varies, depending on deployment, image brightness and pixel pitch. There is also a higher ambient heat generation which may require additional air conditioning. |
In summary we can that each technology has their advantages and that no technology will easily be able to fully replace another.
Projection is by far not dead and has as many advantages as has LED, depending on their application. Making the right decision to get the max bang for one’s buck is important and do not decide on the ‘most modern’ paradigm, which may get you the wrong technology.
Dec 8, 2020

The benefits of the GeoBox G116.
At a price of about A$2500 ex GST, the GeoBox G116 is not necessarily cheap and it seems even more so, since it only has 1 processed HDMI output.
Actually,
this is not totally true, since the unit also has 1 x HDMI loop output, which
mirrors the HDMI input, but more about this later.
So, what do you get for the price and why would you use the product?
The feature list includes:
1 x HMDI 2.0,
1x Display Port 1.2 and
1 x VGA input.
It has a 17x17 control point for warp and Geometry alignment, increasing to over 30 points if the free-of-charge Gwarp 3 software is used.
It has creative video wall setting with Landscape and Portrait arrangement and provides PiP/ PoP capabilities. Functions such as Image rotation and flip to 90/180 and 270 degrees are also included as are image split.
With an input capability of 8K/1K at 3o fps or 4K/60 4:4:4 the unit can work well within any modern display set-up.
But again, what do we use such a unit for.
One application is simple, it can be used as a cascade unit for other GeoBox units in videowall applications, expanding the number of outputs.
G-116 is ideal to be coupled with projectors, which do not have any warping and geometric alignment features.
Furthermore, there is the PiP or PoP function, which allows the insert of a second image at any flexible position.
G-116 can also be used to control the brightness of the projector.
G-116 can be RS232 or IR controlled and also has TCP/IP access, integration into more complex systems is easy.
G-116 will able to enable a cheaper projector with warping and geometric alignment, such as keystone, pincushioning or barrel adjustments (or distortion if required). These features are usually not build-in to these type of projectors.
The unit can be used to calibrate a single projector to an immersive curved screen or even a dome.
In a gallery or museum set-up, maybe even retail, mapping onto objects can be made easy with the wider adjustment capabilities.
Content
selection and switching is another application. It is possible to switch between the three inputs, expanding the capabilities of the projector or digital display.
By the way, what use does the loop output have?
First, we can use it as a duplicate for the HDMI input. The signal can be routed to a control monitor or another display. The Loop output further functions as the output for cascading to other units.
The loop output could be used for some creative projection set-up, whereby the screen is in between two projectors. The scalability of the processed output allows for interesting image effects.
I think the options are plentiful and once you have the unit, you will discover many usages for it.
Considering all this, the price is more then reasonable in particular that this unit can be used, even after the projector or video display has been exchanged.


